RFID / NFC Tag Controlled Music Player (Part 1, prototype)
Hi Internet!
If you have to know one thing about me, is that I like collecting music CDs. I like to look at their album art while listening to music, and I like having it at my shelves to look at, it usually comes with nice artworks in it, and (I think) it gives more to the musician compared to streaming. I'm not a snob and think that somehow, they're superior in quality or whatever, I don't really care about those things. What I do care about though, is that using physical CDs are actually kind of a pain.... You have to put it out of the case, put it in the player, navigate the menu sometimes, and because my only CD player is a PS3, the album art doesn't even show up! Outrageous! That's why I built this device for myself.
The Idea
I want to have a device that, when it scans my physical album, it plays it on my desired device. To accomplish that, I chose RFID. No particular reason other than it's the most convenient, and it also has nifty sticker versions that I can stick to my physical album, that way I can display the album and read it at the same time. Perfect.
Spoiler on how the final prototype looks
Full Code can be seen here.
Parts
In this project, I'll be using an ESP32-WROOM-32 Dev Kit Board that I bought online. You can use whatever board you want, just make sure the libraries work for them. For the reader I used the very cheap RFID-RC522 because the seller where I bought the ESP32 from also sells this. If you don't have it, you also will need some header cables to connect the pins from the RC522 and the ESP32.
MIFARE RFID
So, the RFID sticker that I bought is a MIFARE Classic 1k sticker. That means it has 16 sectors, with each sector have a 4 block, and each block having 16 bytes. If you just count that, that means there's 16 * 4 * 16 = 1024 (1k) byte in each card. But not all of the blocks are writeable. For each sector, there will be 1 block reserved as a Sector Trailer, that means from the original 1024 byte, 16 * 16 = 256 bytes are a reserved bytes and cannot be used to store data. Other that that, one block in sector 0 is reserved for manufacturer data, so your card UID and other data from the factory is stored here. That left us with 784 bytes of data left. Plenty of space for storing YouTube links.

We need to find a way to format our link and store it in the card. I used a very simple way in which I defined the max length of string as 144, defined the start block where I want to start writing the data, and with some maths calculated where the end block should be. Then just used the MFRC522v2 library to write or read the data to the blocks. Done!
Reading and writing is done, all we need to do is just find a way to send the ESP32 some write information and find a way for the ESP32 to control my TV.
HomeAssistant and MQTT
I don't have an NFC reader / writer. I can use my phone, but I can't be bothered to calculate and manually write to each block of my RFID card, that will be too much work! I want for this to also be able to write my RFID. I don't want to it to write all the time, so I want it to be toggleable between read and write mode. I also want to insert the value of what I want to write from somewhere else so that I don't need to tinker with ESP32 all the time. That's where HomeAssistant comes in clutch.
With HomeAssistant, I can create Helpers. It's a simple UI that I can use to trigger things in HomeAssistant, I created a toggle and a text input field.
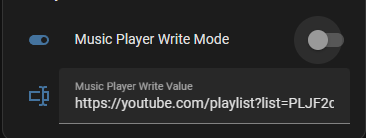
We can setup the helper toggle switch with an automation to send message MQTT to a configured topic with a retain mode. This way whenever the ESP32 connects to the MQTT broker, it will receive the request on what is the current mode and changes it internal value accordingly. This is the same for write value.

For playing the read URL, we also rely a lot on HomeAssistant. Our device when reading the RFID will send the URL to a certain topic, HomeAssistant listen to that topic and triggers an automation.

In my case, I had to add one more action before calling play media on my Google TV. Which is pressing the OK button (DPAD_CENTER) before playing media, in order to escape from screensaver as play media doesn't work from screensaver mode (it works from power off and other states but just not screensaver).